Introduction to Prepreg Carbon Fibre Manufacturing
Prepreg carbon fibre parts offer a sophisticated way to create lightweight, strong, and visually appealing composite parts without the mess of handling wet resins. This guide focuses on out-of-autoclave prepreg systems, which allow hobbyists, small businesses, and professionals to produce high-quality components using standard ovens instead of expensive industrial equipment. Whether you’re crafting structural elements like engine covers or cosmetic panels, this step-by-step tutorial will walk you through the process.
Out-of-autoclave prepregs have revolutionised composite manufacturing by delivering results comparable to traditional methods, with minimal voids and surface imperfections. According to the Composites Manufacturing Association, these materials can achieve up to 60% weight savings compared to metals while maintaining superior strength-to-weight ratios. In this article, we’ll cover everything from material handling to final curing, drawing on proven techniques to ensure your parts turn out professional-grade.
By the end, you’ll have the knowledge to tackle your own projects confidently. Let’s dive in.
What Is Prepreg Carbon Fibre?
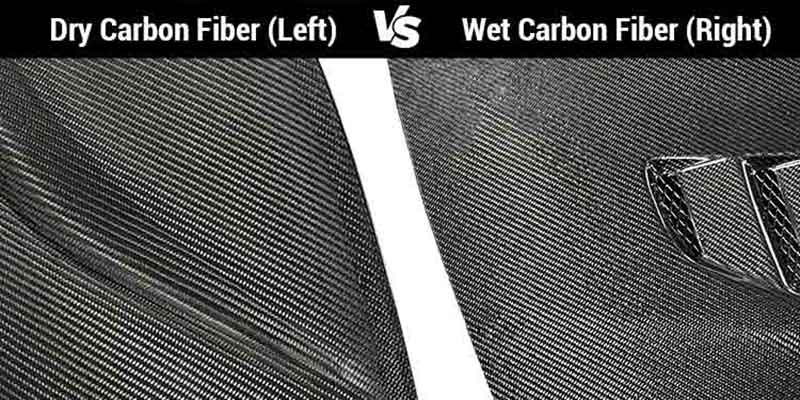
Prepreg, short for pre-impregnated, refers to carbon fibre reinforcements that come factory-infused with a precise amount of resin and hardener. Unlike dry fabrics used in hand layup or infusion processes, prepregs eliminate the need for mixing and applying resins manually. The resin remains stable at room temperature and activates only when heated, giving you control over the curing process.
There are two primary processing methods: autoclave (using pressurised ovens) and out-of-autoclave (using vacuum and standard ovens). Out-of-autoclave systems, like those optimised for low-void content, are ideal for non-industrial settings. Research from the American Society for Composites highlights that these advanced prepreg carbon fibre parts can reduce porosity to under 1%, matching autoclave performance without the high costs.

Benefits of Using Prepreg Carbon Fibre
- Consistency: Pre-impregnation ensures even resin distribution, leading to reliable mechanical properties.
- Efficiency: No wet resins mean cleaner workflows and less waste.
- Versatility: Suitable for complex shapes, from bike frames to aerospace components.
- Quality: Achieves pinhole-free surfaces when processed correctly.
If you’re new to composites, start with a system rated for oven curing at temperatures around 110-135°C for optimal results.
Materials and Equipment Required
To get started, gather these essentials. Out-of-autoclave prepregs are designed for accessibility, but quality tools make a difference.

Key Materials
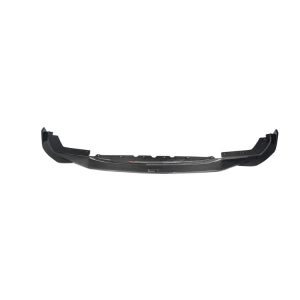
- Prepreg Carbon Fibre: Choose a system like one with 210gsm surface plies for cosmetics and 450gsm backing plies for structure. These provide a balance of aesthetics and strength.
- Mould: High-temperature epoxy or metal moulds are recommended (more on compatibility below).
- Release Agent: A chemical release like silicone-free formulas to prevent sticking.
- Vacuum Bagging Supplies: Unperforated release film, breather fabric, vacuum bag, and sealant tape.
- Templates: Masking tape, fluted signboard for patterning.
Essential Tools
- Cutting Tools: Sharp knife or shears for precise cuts.
- Laminating Tools: Rollers, custom-shaped scrapers, or the back of shears for consolidation.
- Oven: Capable of controlled ramping to 110-150°C.
- Vacuum Pump: For debulking and final bagging, aiming for full vacuum (around 1 bar).
- Freezer: For storage if not using immediately.
A basic setup can cost under $500, scaling up for larger projects. For detailed specs, refer to standards from the Society of Automotive Engineers (SAE), which outline composite tooling requirements.
Mould Compatibility Table
Selecting the right mould material is crucial for success. Here’s a comparison based on temperature resistance and compatibility:
| Mould Material | Temperature Limit | Compatibility | Pros | Cons |
|---|---|---|---|---|
| High-Temp Epoxy Prepreg | 135°C | Excellent | Durable, smooth surface | Higher initial cost |
| Hand-Laminated Epoxy | 120-135°C | Good | Affordable, customizable | Requires sealing |
| Metal (Aluminum/Steel) | 200°C+ | Excellent | Reusable, heat-conductive | Heavy, machining needed |
| Epoxy Model Board | 100-120°C | Moderate | Easy to shape | Limited cycles, needs sealer |
| Polyester/Fibreglass | <100°C | Poor | Cheap | Release issues, low temp |
| Polyurethane Board | <80°C | Incompatible | Soft for prototyping | Causes cure inhibition |
Avoid incompatible materials to prevent failures. For prototypes, epoxy model board sealed with a high-temp coating works well, as noted in FAA composite guidelines.
Storage and Handling of Prepreg
Proper handling ensures your prepreg carbon fibre part remains viable. These materials are shipped frozen and should stay that way until use.
- Storage: Keep in a sealed bag in any freezer (domestic or commercial) at -18°C or below. Systems typically have a 4-week out-life at room temperature before resin advances.
- Defrosting: Allow rolls to thaw in sealed packaging to prevent condensation on the material. This takes 1-2 hours, depending on size.
- Shelf Life: If left out too long (e.g., 6 months), the resin hardens, making it unusable—always check for crispiness.
Industry best practices from the International Association of Plastics Distribution emphasise sealed storage to maintain resin flow properties. Handle with clean gloves to avoid contamination.
Preparing Templates for Your Carbon Fibre Part
Templating is the foundation of accurate laminating. It helps minimise waste and ensures pieces fit perfectly, especially in complex geometries like engine covers.
Start by covering your mould with masking tape to capture the shape. Mark key features, such as corners and edges, where cuts will prevent bridging.
Why Cuts Matter in Templates
Placing cuts in negative features (e.g., corners) simplifies lamination. Without them, material bridges, trapping air and creating voids. With cuts:
- Material conforms easily.
- Overlaps (10-20mm) maintain strength.
For illustration, imagine a corner: A single piece resists pressing down, but split pieces slide and consolidate smoothly.
Transfer the tape to a flat backing like fluted signboard. Flatten, add extensions for overlaps, and cut out templates. Mark fibre orientations (e.g., 0°/90° or 45°) for alignment.
Advanced users can use CAD software for digital flattening, as recommended by Autodesk’s composite design resources.
Cutting the Prepreg Material

Once defrosted, unroll the prepreg on a clean surface. Nest templates efficiently—prepregs tessellate well, reducing waste to under 10%.
- Alignment: Ensure fibre weave matches your marks for structural integrity.
- Cutting: Use a sharp knife for straight lines or shears for curves. Cut surface plies (lighter weight) first, then backing plies (heavier for thickness).
- Special Cuts: For rims or curves, cut strips at 45° to improve drape.
A 210gsm surface ply provides a cosmetic finish, while 450gsm backing builds bulk cost-effectively. Studies from the Journal of Composite Materials show that layered weights optimize flexural strength.
Laminating the Prepreg Layers
Lamination bonds the prepreg to the mould. Apply release agent first—follow datasheet for even coats.
Remove backing paper carefully; it’s tricky but essential. Start from the center and work outward, pressing firmly with tools like rollers or custom scrapers.
Surface Ply Lamination
- Begin with the cosmetic layer.
- Overlap pieces by 10-20mm for continuity.
- Snip material in tight areas to avoid creases.
- Pay extra attention to corners: Press deeply to eliminate air pockets.
For rims, 45° strips follow curves without snipping.
Debulking for Better Consolidation
After the first ply, debulk under vacuum:
- Apply perforated release film and breather.
- Bag and pull full vacuum for 10+ minutes.
- This evacuates air, reducing pinholes—vital for multi-ply laminates.
Post-debulk, the laminate appears smooth and void-free.
Backing Ply Lamination
Repeat with heavier plies. They conform less easily, so use a hairdryer sparingly to soften resin if needed. Maintain overlaps and consolidate thoroughly.
Real-world example: In producing drone frames, debulking cut void content by 50%, per a case study from the European Composites Industry Association.
Vacuum Bagging the Laminate
Vacuum bagging applies even pressure for carbon fibre part curing.
- Apply unperforated release film, creasing into details.
- For small carbon fibre parts, use an envelope bag; add a breather on the mould’s reverse for air paths.
- Manipulate the bag as the vacuum draws down—disconnect/reconnect to reposition without stretching.
- Seal and perform a 10-minute drop test for leaks.
This setup mimics autoclave pressure, ensuring resin flow into all areas.
Curing the Prepreg Carbon Fibre Part
Curing activates the resin. Use a two-step cycle for optimal results:
- Ramp to a low temperature (e.g., 65°C) and hold for resin flow.
- Increase to full cure temperature (e.g., 110°C) for mechanical properties.
Ovens with ramp control are ideal. Datasheets provide cycles based on moulds—follow precisely for <1% voids.
NASA’s composite processing handbooks confirm two-step cures enhance cross-linking, boosting tensile strength by 20-30%.
Monitor with thermocouples for even heating. Cure times vary: 2-4 hours total.
Demoulding and Finishing
Once cooled, remove bagging. Demould gently—parts are sharp, so trim edges with a rotary tool.
For finishing, sand lightly and apply clear coats. Check our guide on cutting prepreg carbon fibre for advanced techniques.
Inspect for pinholes or voids; proper technique yields flawless surfaces.

Common Mistakes and Expert Tips
Avoid these pitfalls:
- Bridging in Corners: Always template cuts—reduces voids by 80%.
- Poor Vacuum Seals: Test rigorously; leaks ruin cures.
- Overheating: Stick to cycles to prevent resin degradation.
Tips
- Start small: Practice on flat panels.
- Scale up: For larger parts, multiple debulks are key.
- Safety: Use gloves, ventilation—resins can irritate.
Data from the Institute of Materials, Minerals and Mining shows meticulous lamination improves part lifespan by 2x.
Conclusion: Mastering Prepreg Carbon Fibre Part
Making prepreg carbon fibre parts is accessible and rewarding, yielding professional results with practice. From templating to curing, focus on precision for void-free, strong components. This method suits everything from prototypes to production, offering unmatched performance.
Experiment, iterate, and update your techniques with emerging trends—like bio-based resins for sustainability, as per recent Composite World reports. If you’re ready, gather materials and start building
If you want to customise carbon composite products, please contact us!